Build an Isomorphic Application using Deno and React without WebPack
Currently setting up a Server Side Render (SSR) application is a pain in nodejs. There are many scaffolds available for nodejs. But it comes with its own tech-depth and learning curves. This also includes hidden configurations of Webpack.
All in all, when you give Webpack a chance, your encounter will rarely be a pleasant one.

Read More: https://www.north-47.com/knowledge-base/webpack-the-good-the-bad-and-the-ugly/
Overview
According to the wiki, An isomorphic JavaScript(also known as Universal JavaScript) is described as JavaScript applications that run both on the client and the server.

If I say, you can build an entire SSR without setting up installing any external nodejs dependency. Would you believe it? I guess NO.
However, In this tutorial, I will explain how to set up a simple SSR app without installing a single nodejs library or bundler. That also including a hydrate react app(isomorphic app).
Set-up
Start with npm init
Don’t be afraid, To do things differently, we will not install any nodejs libraries. However, I still like npm as a task runner. So let’s use it. Create a folder SSR and init npm package.json
md -p examples/ssr

cd examples/ssr

## init npm package

npm init --y
Backend
Add Basic deno server: Create server.tsx a file and add below code
import { Application, Router } from "https://deno.land/x/oak@v6.0.1/mod.ts";

const app = new Application();

const router = new Router();
router.get("/", handlePage);

app.use(router.routes());
app.use(router.allowedMethods());

console.log("server is running on http://localhost:8000/");
await app.listen({ port: 8000 });

function handlePage(ctx: any) {
  try {
    ctx.response.body = `<!DOCTYPE html>
  <html lang="en">
  <head>
    <meta charset="UTF-8">
    <meta name="viewport" content="width=device-width, initial-scale=1.0">
    <title>Document</title>
  </head>
  <body >
    <div id="root"><h1>Hello SSR</h1></div>
  </body>
  </html>`;
  } catch (error) {
    console.error(error);
  }
}
We will use oak module here to create Deno server. You can create your own server. For that read my article Creating Routing/Controller in Deno Server(From Scratch)
Add below command in package.json.
"scripts": {
    "start": "deno run --allow-net server.ts",
    "test": "echo \"Error: no test specified\" && exit 1"
  },
Run:
Now we can run the application and verify on http://localhost:8000/.
npm run start
Add React Server Render
Now we can run the application. Let us add our first rendering code. For that, we need to ReactJS. Since Deno uses ES Module import, We will use the CDN hosted version of react and react-dom. For that, there is a good CDN provider https://jspm.dev/.
jspm provides a module CDN allowing any package from npm to be directly loaded in the the browser and other JS environments as a fully optimized native JavaScript module.
Now since we are going to write some TSX syntax(typescript JSX). We have to change the file extension of server.ts to server.tsx. Let’s do that and update package.json.
mv server.ts server.tsx
"scripts": {
    "start": "deno run --allow-net server.tsx",
    "test": "echo \"Error: no test specified\" && exit 1"
  },
Create a common dependency deps.ts file
// @deno-types="https://denopkg.com/soremwar/deno_types/react/v16.13.1/react.d.ts"
import React from "https://jspm.dev/react@17.0.2";
// @deno-types="https://denopkg.com/soremwar/deno_types/react-dom/v16.13.1/server.d.ts"
import ReactDOMServer from "https://jspm.dev/react-dom@17.0.2/server";
// @deno-types="https://denopkg.com/soremwar/deno_types/react-dom/v16.13.1/react-dom.d.ts"
import ReactDOM from "https://jspm.dev/react-dom@17.0.2";

export { React, ReactDOM, ReactDOMServer };
Add below lines in server.tsx
import { Application, Router } from "https://deno.land/x/oak@v6.0.1/mod.ts";

import { React, ReactDOMServer, ReactDOM } from "./dep.ts";

const app = new Application();

const router = new Router();
router.get("/", handlePage);

app.use(router.routes());
app.use(router.allowedMethods());

console.log("server is running on http://localhost:8000/");
await app.listen({ port: 8000 });

function App() {
  return <h1>Hello SSR</h1>;
}
function handlePage(ctx: any) {
  try {
    const body = ReactDOMServer.renderToString(<App />);
    ctx.response.body = `<!DOCTYPE html>
  <html lang="en">
  <head>
    <meta charset="UTF-8">
    <meta name="viewport" content="width=device-width, initial-scale=1.0">
    <title>Document</title>
  </head>
  <body >
    <div id="root">${body}</div>
  </body>
  </html>`;
  } catch (error) {
    console.error(error);
  }
}
Run the app again. You will see errors on the console.
TS7026 [ERROR]: JSX element implicitly has type 'any' because no interface 'JSX.IntrinsicElements' exists.
return
Hello SSR
This error is due to missing typings to react. Since we do not include types to react. We have to let know the typescript compiler. How it should treat JSX(TSX) syntax.
To suppress these errors, Add below lines.
function App() {
  return <h1>Hello SSR</h1>;
}
Now run the server again. You can see your first React SSR running on the browser. Nice!
Adding Server Controller- Create Backend APIs
Let’s move further and start adding a few core features for Server. Let’s add some server-side data for our app. For that, we will include a few routes on Oak Server. Oak
const router = new Router();
router.get("/", handlePage);

let todos: Map<number, any> = new Map();

function init() {
  todos.set(todos.size + 1, { id: Date.now(), task: "build an ssr deno app" });
  todos.set(todos.size + 1, {
    id: Date.now(),
    task: "write blogs on deno ssr",
  });
}
init();
router
  .get("/todos", (context) => {
    context.response.body = Array.from(todos.values());
  })
  .get("/todos/:id", (context) => {
    if (
      context.params &&
      context.params.id &&
      todos.has(Number(context.params.id))
    ) {
      context.response.body = todos.get(Number(context.params.id));
    } else {
      context.response.status = 404;
    }
  })
  .post("/todos", async (context) => {
    const body = context.request.body();
    if (body.type === "json") {
      const todo = await body.value;
      todos.set(Date.now(), todo);
    }
    context.response.body = { status: "OK" };
  });

app.use(router.routes());
app.use(router.allowedMethods());
Here in the above code, We have created three routes.
- GET
/todos/to get a list of the todos - GET
/todos/:idto todo by id - POST
/todos/create a new todo
function init() to create some initial dummy todos. You can use postman to try-out get and post data.
Client Side App
Add List Todos to React App
Since now we have API to create todos and consume todos. Let’s list down all this on our react app. For that add the below-mentioned code.
function App() {
return (
<div>
<div className="jumbotron jumbotron-fluid">
<div className="container">
<h1 className="display-4">ToDo's App</h1>
<p className="lead">This is our simple todo app.</p>
<ListTodos items={Array.from(todos.values())} />
</div>
</div>
</div>
);
}
interface Todo {
task: string;
}
interface ListTodos{
items: Todo[]
}
function ListTodos({ items = [] }: ListTodos) {
return (
<div>
<ul className="list-group">
{items.map((todo: any, index: number) => {
return (
<li key={index} className="list-group-item">
{todo.task}
<button
type="button"
className="ml-2 mb-1 close"
aria-label="Close"
>
<span aria-hidden="true">×</span>
</button>
</li>
);
})}
</ul>
</div>
);
}
function handlePage(ctx: any) {
try {
const body = ReactDOMServer.renderToString(<App />);
ctx.response.body = `<!DOCTYPE html>
<html lang="en">
<head>
<meta charset="UTF-8">
<meta name="viewport" content="width=device-width, initial-scale=1.0">
<link rel="stylesheet" href="https://stackpath.bootstrapcdn.com/bootstrap/4.3.1/css/bootstrap.min.css" integrity="sha384-ggOyR0iXCbMQv3Xipma34MD+dH/1fQ784/j6cY/iJTQUOhcWr7x9JvoRxT2MZw1T" crossorigin="anonymous">
<title>Document</title>
</head>
<body >
<div id="root">${body}</div>
</body>
</html>`;
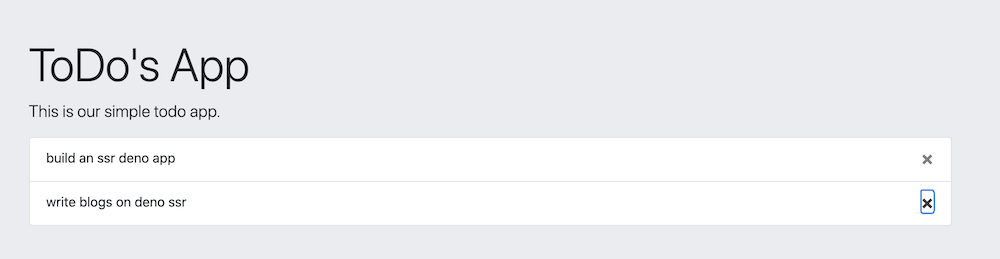
Update all the changes and run the app. You will see a list of Todos containing two rows of initial data. You can use curl post data to route POST/todos/ to create new records. Once you add a post, refresh the page, You will see added new post data.
curl --header "Content-Type: application/json" \
  --request POST \
  --data '{"task":"Create postman script"}' \
  http://localhost:8000/todos/
If you noticed, I have added basic bootstrap to make UI nicer. You can use some other CSS library.
Tada! Now you have running the SSR app. You can replace the in-memory todos store to any persistent database. The result will be the same.
Now time to add some interactive behavior in Our react app(client-side). But before doing that, let’s move our react code to some separate file app.tsx.
Create a file app.tsx:
import { React } from "./dep.ts";
/*
// enable in case of old react module
declare global {
namespace JSX {
interface IntrinsicElements {
[key: string]: any;
}
}
}
*/
interface AppProps {
todos?: Todo[];
}
interface Todo {
task: string;
}
function App({ todos = [] }: AppProps) {
return (
<div>
<div className="jumbotron jumbotron-fluid">
<div className="container">
<h1 className="display-4">ToDo's App</h1>
<p className="lead">This is our simple todo app.</p>
<ListTodos items={todos} />
</div>
</div>
</div>
);
}
interface ListTodos {
items: Todo[];
}
function ListTodos({ items = [] }: ListTodos) {
return (
<div>
<ul className="list-group">
{items.map((todo: any, index: number) => {
return (
<li key={index} className="list-group-item">
{todo.task}
<button
type="button"
className="ml-2 mb-1 close"
aria-label="Close"
>
<span aria-hidden="true">×</span>
</button>
</li>
);
})}
</ul>
</div>
);
}
export default App;
Notice the change in the App component. Since we do not have direct access to todos now, We need to pass data as props while rendering it. Corresponding changes have been done for ListTodos.
import { React, ReactDOMServer, ReactDOM } from "./dep.ts";

import App from "./app.tsx";

/// rest of the code

function handlePage(ctx: any) {
  try {
    const body = ReactDOMServer.renderToString(
      <App todos={Array.from(todos.values())} /> // change here to pass todos as props
    );

  // rest of the code
}
Run the app and see changes on the browser, If all good there will be no change in the final output.
Adding delete functionality on client-side
function ListTodos({ items = [] }: ListTodos) {
const [deletedIdxs, setDeletedIdxs] = (React as any).useState([]);
return (
<>
<ul className="list-group">
{items.map((todo: any, index: number) => {
const deleted = deletedIdxs.indexOf(index) !== -1;
return (
<li
key={index}
className="list-group-item"
style={{ color: deleted && "red" }}
>
{todo.task}
<button
type="button"
className="ml-2 mb-1 close"
aria-label="Close"
onClick={() => setDeletedIdxs([...deletedIdxs, index])}
>
<span aria-hidden="true">×</span>
</button>
</li>
);
})}
</ul>
</>
);
}
Once you do the above changes and try to delete by clicking on cross-button. You will see no change in UI. By code, it should turn the element color to red. So what could be the reason for that?
Answer: Hydrate
Since we are using ReactDOMServer.renderToString the library which converts React app to string. So we lose all JS capabilities. To re-enable react js on the client-side. For that React provides you Hydrate module(API). This hydrate API re-enable the react feature on the client-side again. This makes our app Isomorphic app. More: Hydrate
Adding hydrate is a tough task to do. But Awesome Deno shines well here too. Deno provides Bundle API to convert a script to js. We will use Deno.emit to create hydrate js for the client-side.
Create a new file client.tsx and add below codes:
import { React, ReactDOM } from "./dep.ts";

import App from "./app.tsx";

(ReactDOM as any).hydrate(<App todos={[]} />, document.getElementById("root"));
Add below codes to compile and convert client.tsx to serve as a route in our server.
// initial code
const { files } = await Deno.emit("./client.tsx", { bundle: "module" });
const clientJS = files["deno:///bundle.js"] || "";

const serverrouter = new Router();
serverrouter.get("/static/client.js", (context) => {
  context.response.headers.set("Content-Type", "text/html");
  context.response.body = clientJS;
});
app.use(router.routes());
app.use(serverrouter.routes());
// rest of the code
function handlePage(ctx: any) {
  try {
    const body = ReactDOMServer.renderToString(
      <App todos={Array.from(todos.values())} /> // change here to pass todos as props
    );
    ctx.response.body = `<!DOCTYPE html>
  <html lang="en">
    <!--Rest of the code -->
    <div id="root">${body}</div>
    <script  src="http://localhost:8000/static/client.js" defer></script>
  </body>
  </html>`;
  } catch (error) {
    console.error(error);
  }
Since we are using unstable API deno.emit, You have to update package.json and add more flags. Same time, We are using DOM with typescript. So we have to add custom tsconfig.json.
{
  "scripts": {
    "start": "deno run --allow-net --allow-read --unstable server.tsx -c tsconfig.json",
    "test": "echo \"Error: no test specified\" && exit 1"
  }
}
{
  "compilerOptions": {
    "target": "es6" /* Specify ECMAScript target version: 'ES3' (default), 'ES5', 'ES2015', 'ES2016', 'ES2017', 'ES2018', 'ES2019', 'ES2020', or 'ESNEXT'. */,
    "module": "commonjs" /* Specify module code generation: 'none', 'commonjs', 'amd', 'system', 'umd', 'es2015', 'es2020', or 'ESNext'. */,
    "lib": [
      "DOM",
      "ES2017",
      "deno.ns"
    ] /* Specify library files to be included in the compilation. */,
    "strict": true /* Enable all strict type-checking options. */,
    "esModuleInterop": true /* Enables emit interoperability between CommonJS and ES Modules via creation of namespace objects for all imports. Implies 'allowSyntheticDefaultImports'. */,
    "skipLibCheck": true /* Skip type checking of declaration files. */,
    "forceConsistentCasingInFileNames": true /* Disallow inconsistently-cased references to the same file. */
  }
}
You can use runtime compile as CLI to convert client.tsx before even starting the server. However, I just wanna show a cool way of doing it. So I use Deno.emit on runtime.
Final Touch
Initialize initial state
Once you do all the above-mentioned changes, Re-Run app. You will notice the list is the visible and hidden same time. This is because we react hydrate start working and it is trying to re-initialize the app. So all the data we render from the server is gone to persist data we need to pass data as application initial data. There are a lot of patterns to pass initial data. We will use the simple window global data.
Let’s start data on the window after making below changes on the given files.
function handlePage(ctx: any) {
  try {
    const body = ReactDOMServer.renderToString(
      <App todos={[]} />
    );
    ctx.response.body = `<!DOCTYPE html>
    <title>Document</title>
    <script>
      window.__INITIAL_STATE__ = {"todos": ${JSON.stringify(
        Array.from(todos.values())
      )}};
    </script>
  </head>
// initial codes
declare global {
  var __INITIAL_STATE__: any;
}
import App from "./app.tsx";
const { todos } = window.__INITIAL_STATE__ || { todos: [] };
(ReactDOM as any).hydrate(
  <App todos={todos} />,
  document.getElementById("root")
);
After the changes, all the files will look as below.
import { React } from "./dep.ts";
interface AppProps {
todos?: Todo[];
}
interface Todo {
task: string;
}
function App({ todos = [] }: AppProps) {
return (
<div>
<div className="jumbotron jumbotron-fluid">
<div className="container">
<h1 className="display-4">ToDo's App</h1>
<p className="lead">This is our simple todo app.</p>
<ListTodos items={todos} />
</div>
</div>
</div>
);
}
interface ListTodos {
items: Todo[];
}
function ListTodos({ items = [] }: ListTodos) {
const [deletedIdxs, setDeletedIdxs] = (React as any).useState([]);
return (
<div>
<ul className="list-group">
{items.map((todo: any, index: number) => {
const deleted = deletedIdxs.indexOf(index) !== -1;
return (
<li
key={index}
className="list-group-item"
style={{ color: deleted ? "red" : "green" }}
>
{todo.task}
<button
type="button"
className="ml-2 mb-1 close"
aria-label="Close"
onClick={() => setDeletedIdxs([...deletedIdxs, index])}
>
<span aria-hidden="true">×</span>
</button>
</li>
);
})}
</ul>
</div>
);
}
export default App;
import { React, ReactDOM } from "./dep.ts";

declare global {
  var __INITIAL_STATE__: any;
}
import App from "./app.tsx";
const { todos } = window.__INITIAL_STATE__ || { todos: [] };
(ReactDOM as any).hydrate(
  <App todos={todos} />,
  document.getElementById("root")
);
import { Application, Router } from "https://deno.land/x/oak@v6.0.1/mod.ts";

import { React, ReactDOMServer } from "./dep.ts";

import App from "./app.tsx";

const app = new Application();

const router = new Router();
router.get("/", handlePage);

let todos: Map<number, any> = new Map();

function init() {
  todos.set(todos.size + 1, { id: Date.now(), task: "build an ssr deno app" });
  todos.set(todos.size + 1, {
    id: Date.now(),
    task: "write blogs on deno ssr",
  });
}
init();
router
  .get("/todos", (context: any) => {
    context.response.body = Array.from(todos.values());
  })
  .get("/todos/:id", (context: any) => {
    if (
      context.params &&
      context.params.id &&
      todos.has(Number(context.params.id))
    ) {
      context.response.body = todos.get(Number(context.params.id));
    } else {
      context.response.status = 404;
    }
  })
  .post("/todos", async (context: any) => {
    const body = context.request.body();
    if (body.type === "json") {
      const todo = await body.value;
      todos.set(Date.now(), todo);
    }
    context.response.body = { status: "OK" };
  });

const { files } = await Deno.emit("./client.tsx", { bundle: "module" });
const clientJS = files["deno:///bundle.js"] || "";

const serverrouter = new Router();
serverrouter.get("/static/client.js", (context: any) => {
  context.response.headers.set("Content-Type", "text/html");
  context.response.body = clientJS;
});
app.use(router.routes());
app.use(serverrouter.routes());

app.use(router.allowedMethods());

console.log("server is running on http://localhost:8000/");
await app.listen({ port: 8000 });

function handlePage(ctx: any) {
  try {
    const body = ReactDOMServer.renderToString(
      <App todos={[]} /> // change here to pass todos as props
    );
    ctx.response.body = `<!DOCTYPE html>
  <html lang="en">
  <head>
    <meta charset="UTF-8">
    <meta name="viewport" content="width=device-width, initial-scale=1.0">
    <link rel="stylesheet" href="https://stackpath.bootstrapcdn.com/bootstrap/4.3.1/css/bootstrap.min.css" integrity="sha384-ggOyR0iXCbMQv3Xipma34MD+dH/1fQ784/j6cY/iJTQUOhcWr7x9JvoRxT2MZw1T" crossorigin="anonymous">
    <title>Document</title>
    <script>
      window.__INITIAL_STATE__ = {"todos": ${JSON.stringify(
        Array.from(todos.values())
      )}};
    </script>
  </head>
  <body >
    <div id="root">${body}</div>
    <script  src="http://localhost:8000/static/client.js" defer></script>
  </body>
  </html>`;
  } catch (error) {
    console.error(error);
  }
}
{
  "name": "deno-react-ssr",
  "version": "1.0.0",
  "description": "",
  "main": "index.js",
  "scripts": {
    "start": "deno run --allow-net --allow-read --unstable  server.tsx -c tsconfig.json",
    "start:clean": "deno run --allow-net --allow-read --unstable --reload server.tsx -c tsconfig.json",
    "test": "echo \"Error: no test specified\" && exit 1"
  },
  "keywords": [],
  "author": "",
  "license": "ISC"
}
Now you have a running, working SSR/Isomorphic App that is fully written in Deno. We didn’t use any nodejs/npm modules or WebPack.
Thanks for reading this tutorial. Please follow me to support me. For more of my work, check-out my website https://decipher.dev/.
You can find all the code in examples/ssr folder on my Github repo.
Final Domo

Hope you like this tutorial, Please follow me and clap for me on medium: isomorphic-application